Empadinha
Empada, or empadinha (the diminutive of the word), is
another traditional Brazilian salgadinho
– the same category of savory bite-size treats that also includes the Coxinha. They look like tiny little two-crust
pies, but they are savory. The empadinha’s dough can be mealy and somewhat dry
(“empada de massa podre”), or thin and elastic (“empada de massa
fina”, picture below), but the latter is a less common. Empadão, which is the augmentative of the word, are large savory
pies sold in padarias and lanchonetes that Brazilians eat by the slice for a
fast meal, usually sided by a small salad, and seasoned with some hot pepper
sauce.
The most
traditional empada fillings are
chicken (same as the one used for Coxinha!), hearts of palm and shrimp, and all of them can
include Catupiry® or requeijão
(Brazilian creamy cheeses). But there are several other fillings. In large
urban areas, such as Sao Paulo and Rio de Janeiro, there are even places
dedicated only to selling empadas,
where they offer dozens of varieties.
The secret to a good empadinha is to have a moist filling and just the right amount of
dough. Prepare the filling in advance, as it should be at room temperature or
cold before it can be placed inside the dough shells. Baked empadas can be frozen and then reheated
in the oven before serving. I hope you’ll end up enjoying these savory, tiny
treats as much as I do.
Empadinha
de massa podre
Hearts
of palm filling
1 tbsp olive oil
1/4 cup small dice onion
2 skinless, seedless, fresh tomatoes, finely
chopped
400g (2x14oz cans) hearts of palm, diced (Roland® is a good brand)
1/2 cup frozen peas
7 small green olives, finely chopped
1 cup whole milk
1 tbsp cornstarch
salt, pepper and finely chopped Italian parsley
to taste
1. Heat the oil in a medium saucepan and sauté
the onion over high heat until golden brown.
2. Add the tomato and cook, stirring, for 3-5
minutes.
3. Add the hearts of palm, season with salt and
pepper to taste. Lower the heat to medium and let cook, partially covered, for
5 minutes. Add a little water, if too dry.
4. Add the peas and the olives to the pan and
stir to combine.
 5. Dissolve the cornstarch in 1tbsp of the
milk, then add this mixture to the remaining milk and stir well to combine. Pour
the milk into the pan, stirring constantly, and cook until thickened.
6. Turn off the heat. Add the parsley, adjust
the seasoning and let cool before using.
Mealy Dough
for Empada
450g (1 lb) all-purpose flour + 50g (2 oz) to
dust
150g (5 oz) vegetable shortening
2 eggs + 1 egg yolk for brushing
1 tsp salt
25ml (1 fl oz) cold water
1. Cut the butter and shortening into the flour
until the mixture resembles fine breadcrumbs.
2. Add eggs, salt and water and knead to
combine. Let rest for 30 minutes.
Assembling
1. To make empadinha,
take small portions of the dough (roughly 1 tbsp) and use it to line the bottom and sides of an empadinha
mold (or mini cupcake mold), using the tips of your thumbs.
2. Add the filling, being careful not to let it touch the rim.
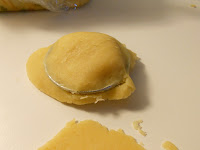
3. Roll out a smaller circle of dough and cover
the filling, pressing against the sides to seal and to trim the excess dough.
4. Preheat the oven to 350oF / 180oC.
Brush the tops with egg yolk beaten with 1 tsp water and bake until golden
brown. Serve warm or cold.


This is one of my favorite, especially empadinha de frango. Thank you for posting this recipe. I will definitely use it! - Saskia
ReplyDeleteThank you, Saskia! Let me know how they came out :o)
ReplyDeleteAnd if you want the recipe for the other dough (empada de massa fina), I have it, just let me know. The chicken filling you can find at the Coxinha page (there's a link in this text that takes you there).
Bom apetite!
I love your blog. Always with good recipes. I will try that one, but because i don't have the small baking pan, i might try the muffin baking pan. I hope it works.
ReplyDeleteThank you, my dear San! You can borrow my "forminhas" ;o)
ReplyDeleteMy grandmother Olga used to make those for my birthday, with the same kind of little tins, some even smaler. The memories this brings!!!!
ReplyDelete